Taking care of our planet matters to me more and more as time passes by. Slowly, I’m becoming more aware of how much we just use and throw away, and consequently, waste is becoming something that bothers me. Even throwing away onion peals or eggs shells is something that doesn’t sit right with me anymore. If it can be transformed, then I want to do it.
While a compost bin still has some “questions of logistics” to be considered, I can start re-purpose other things. And the next item on the list of “things that have a short life span” comes water bottles. Yes, they can be recycled, although I’m still using them once and then throwing them away (to recycling). I want to give them a new life before they are shredded into tiny pieces to be reborn again.
Then one day, while losing myself in the slow living videos on YouTube, something caught my eye. A water bottle plant pot or a self-watering system – as it’s actually called. And at that moment, I felt like I stroked gold. It was genius! I have a little balcony garden to plant vegetables for my bunny, and the lack of plant pots was becoming a problem. And right there was my solution. Transform water bottles and reuse them as plant pots!
After losing myself once again in all the YouTube videos, I’ve managed to find the one I saw. I’ll leave here a link to the video where you can see how Hamimommy does the water bottles and other tips and tricks to grow plants indoors. She provides the video, and I provide the pictures and an explanation with notes of what didn’t work out not so well.
The DIY is very straightforward. You’ll need:
- Water bottle
- Scissor or craft knife
- Absorbent cotton cloth


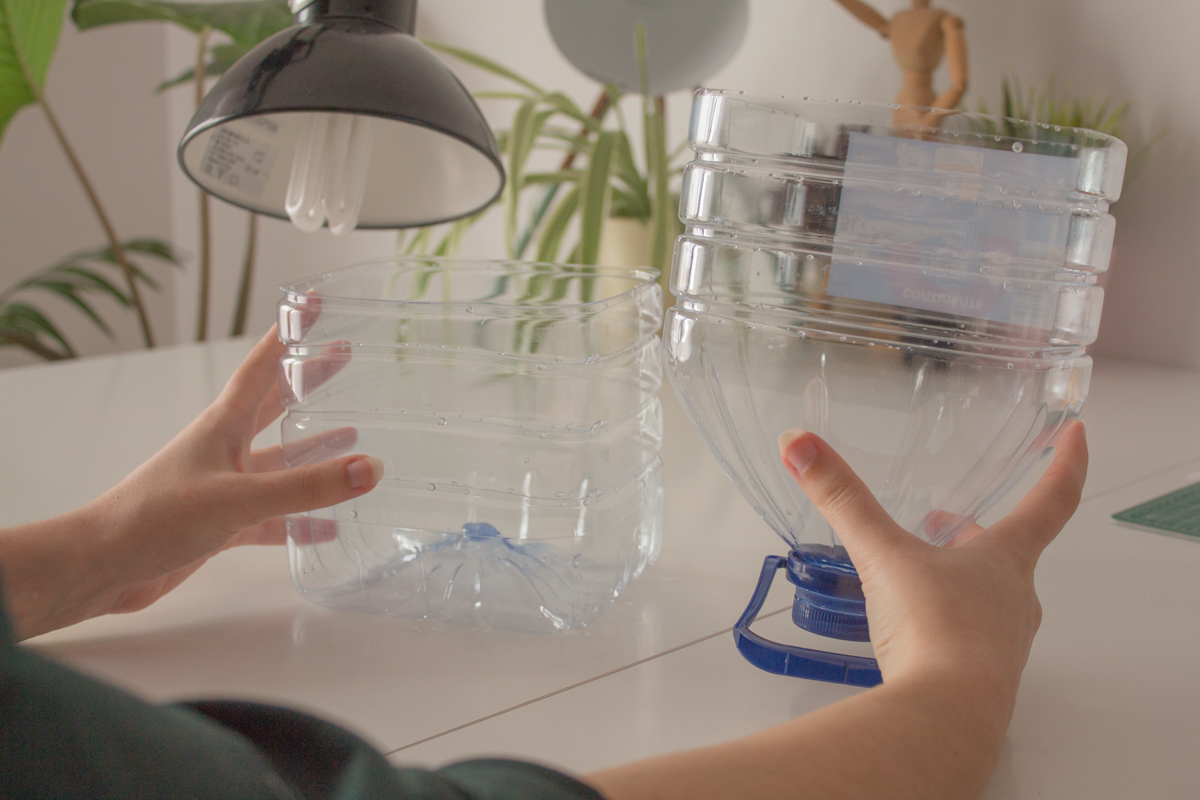
Step 1. Start by cutting the water bottle crosswise, either halfway or closer to the top. When finding the middle point, remember to count to the cap.
The upper part of the bottle is where the soil is going, so if you cut it too short, you won’t have much space. Although if you cut beyond the halfway point, then the upper part will be too big to fit the bottom half.
Step 2. Remove the cap and use a craft knife to cut a small hole.
I use a craft knife to cut a squared hole with the cap facing down so I can press it as hard as I want without the risk of insuring myself. In the video, Hamimommy uses a screwdriver to punch the hole. Either way, be careful!
Step 3. Cut the cloth into strips wider than the hole you just pierced and longer than the bottom half of the bottle. This is to make sure you have enough fabric to stay in contact with the soil and the water.
Step 4. Put the cloth through the cap, leaving one end longer than the other and twist the cap back on the bottle. Here you can adjust the cloth, so it only goes about halfway inside the bottle.


Step 5. Add the soil, the plant or seeds, fill the bottom with water, and let it grow in a sunny spot! That’s it. You have now a self-watering system made out of a water bottle.
There are two things I want to note about using this self-watering system outdoors. As I said earlier, my primary idea was to create plant pots to have on my balcony, and one thing I quickly started to see was algae. Stagnated water under direct sunlight over an extended period will eventually develop algae which doom the water as unusable. When I realised what was happening, I stopped using the cloth and even ended up removing the ones I had put in. I didn’t want the plants to absorb any of that water.
Also, since the soil is exposed to direct sunlight, it developed moss on the inside of the bottle. That doesn’t bring any problem and serves as a mere indicator of a drainage problem caused by the condensation created inside the bottle as the soil heats up and isn’t aired properly. Both situations can be managed better by covering the plastic with rope, for example.

Before adding the soil, I covered one of the bottles with rope, and it’s the only one that managed to keep water inside without the formation of any algae. Although this was a very time-consuming process and uses a lot of material. But the general idea is to use something to block the direct sunlight from the plastic, avoiding creating the perfect conditions for algae to thrive.
I’ve been on Pinterest to see what other uses there might be for water bottles in the garden, and there are so many. I had no idea! Then, I realised that I didn’t strike gold at all, and this DIY is quite common. Although, I thought it would still be useful to trow in my experience using this system.
There are a lot of other creative uses for water bottles, from drip irrigation to vertical gardens or even just incubators for protecting growing plants. Plastic and nature might not be the best combination, but with some creativity, it can be turned into something useful after its use, reused, and even recycled later (maybe).