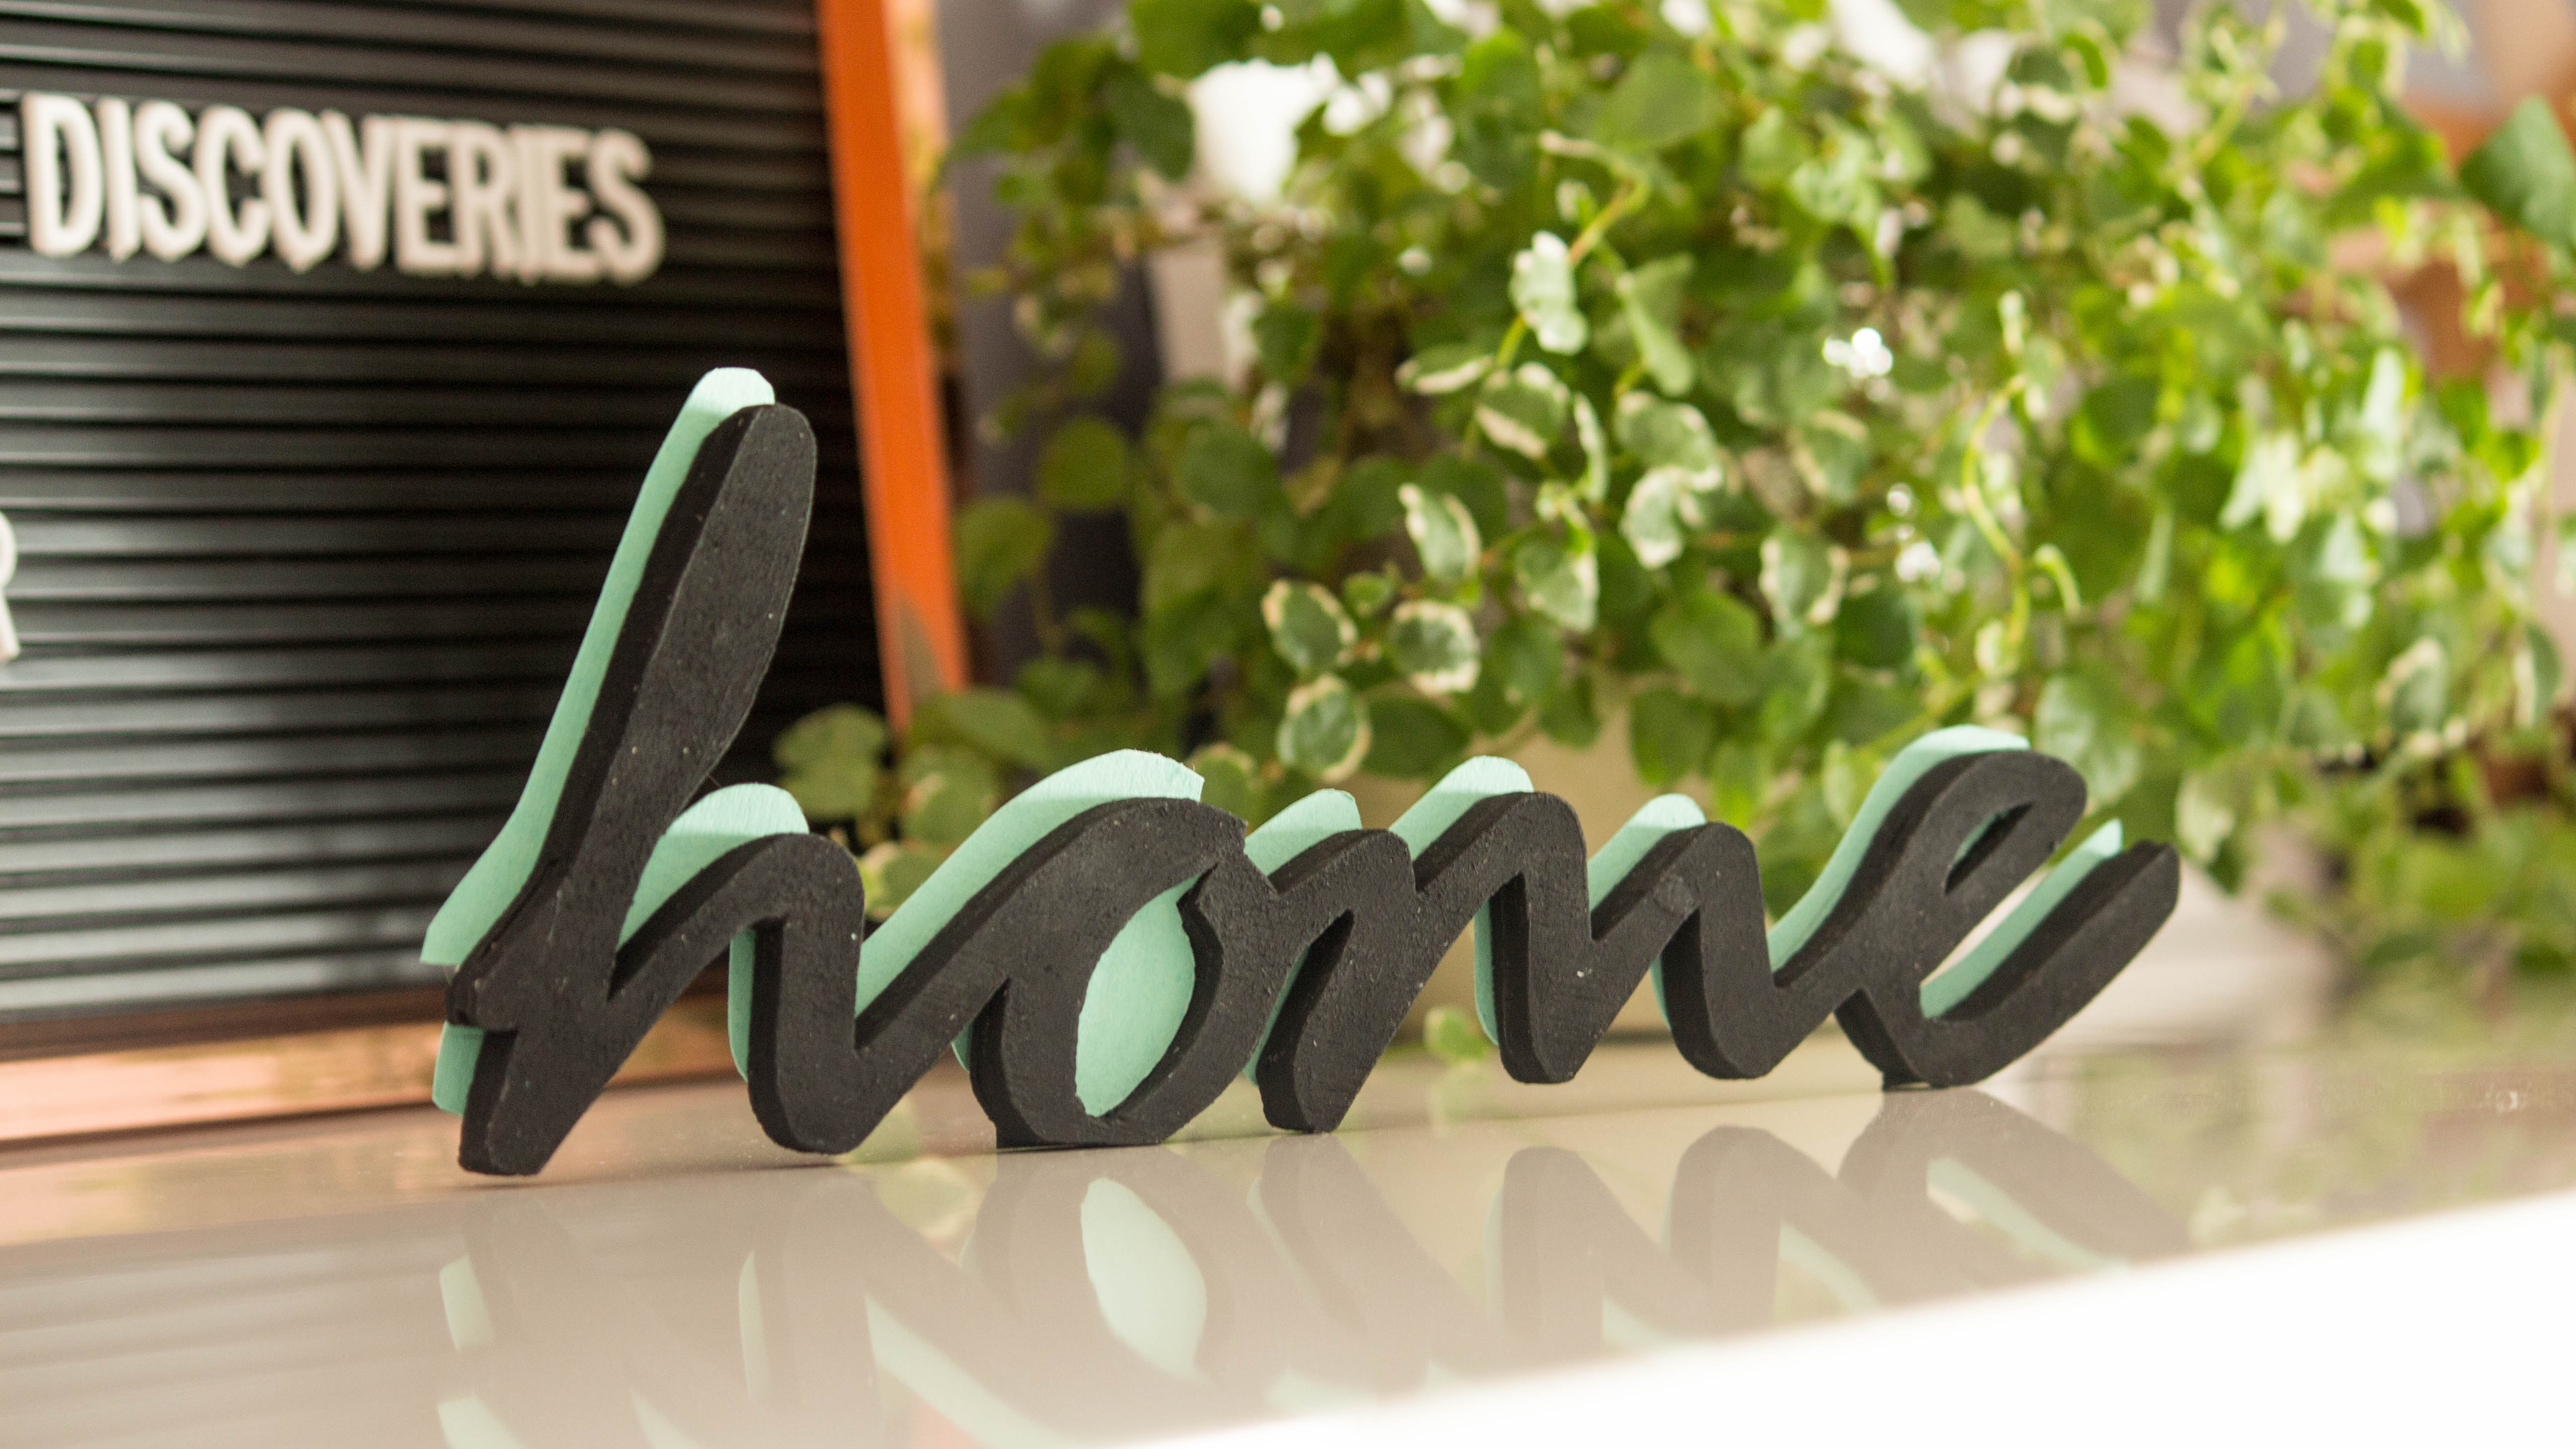
I wanted to make this DIY for quite some time. I got inspired while scrolling down Karen Kavett‘s Instagram and found this. The “hello” postcard immediately stick out for me and I wanted to make those letters in 3D. I always wanted those cute handwritten sign to place on my shelves that you see everywhere, and since I couldn’t find any, I better create my own. Although, it wasn’t that simple. What sticks out the most in the word are the coloured shades, so I had to have them but how? After a quick brainstorm, I got to an idea that possibly – possibly – could work, and I started making it. But as soon as I grab my knife the problems appeared. The amount of work, strength and steel nerves I had to have for it to work it wasn’t worth the effort.
The easiest wood to work with is the balsa wood, it’s very soft although that also makes it very fragile. The thicker the boards are the more strength you have to do to cut it which means you can easily break it. I can’t tell you how frustrating it was to be cutting it as carefully as I could and then *crack* it broke in half. Since my first attempt and fresh new eyes, I decided it was time to take this DIY till the end. And I’m proud to say I find a way to solve my number one problem and also to create my so wanted colourfull shade.
Supplies:
Balsa Wood (2mm thick)
Glue
X-acto Knife
Cardstock (Turquoise)
Acrylic Paint (Black)
Word Templates ( HOME / CREATE )
Sandpaper/Nail file

Step 1. Print and cut out the word shape. With small pieces of tape attach the paper to the wood board. Grab a pencil and decal the outer shape.

Step 2. With a knife gently and carefully cut out the drawn shape. To make the job a lot easy try to cut straight lines instead of doing curves. Once the word is cut out, you can perfect the curved corners with sandpaper or a nail file.

Step 3. Repeat the same process two more times but also cut out the holes in the letters.
Step 4. Grab the card stock and mark the entire word including the wholes (don’t throw them away). Cut it out and leave it aside for now.
OR


If you forget to do this step – like I did – you can use tape to trace the shape of the wholes, glue it to the cardstock and cut it out.


Step 5. Glue all the parts together making sure they are aligned with each other. Use the sandpaper again to level all the sides and corners. Keep placing it on the table to see if it can stand on it’s on. If it can’t, you can always have little back pieces on the bottom to make the base thicker or correct any tilted bits.

Step 6. Clean the wood from any dirt and paint the entire word from all sides. If you have to give it a second coat.

Step 7. Glue the inside pieces that you cut out from the cardstock to make the holes on the wood. Use a knife or a needle to help you press it down in place.


Step 8. Place the wooden word on top of the cardstock cut out sliding it across to create the “shade” you want. Use a pencil to mark the limit of the letters in the cardstock and use it as a guide to applying glue. Press it down and let it dry.
And it’s done! I actually really like how it turned out. For this post, I went for a simple colour scheme, but nothing holds you to make it more fun. The other sign I did as an experiment also turned out pretty nice. And now that I know the easiest way to make it, for sure I’m going to do more in the near future.