Usually, when I brainstorming ideas, they tend to come in pairs. The first one, I already posted last month, I’m talking about the Record Player Stand. I decided to buy wood crates and get creative with them. I was thinking to do a post like “two supplies and multiple possibilities” or something close to that. But when I started working on the first project, I decided it would be better to separate both ideas. With this in mind, both projects are somewhat similar. However, I still tried to come up with something I never did before.
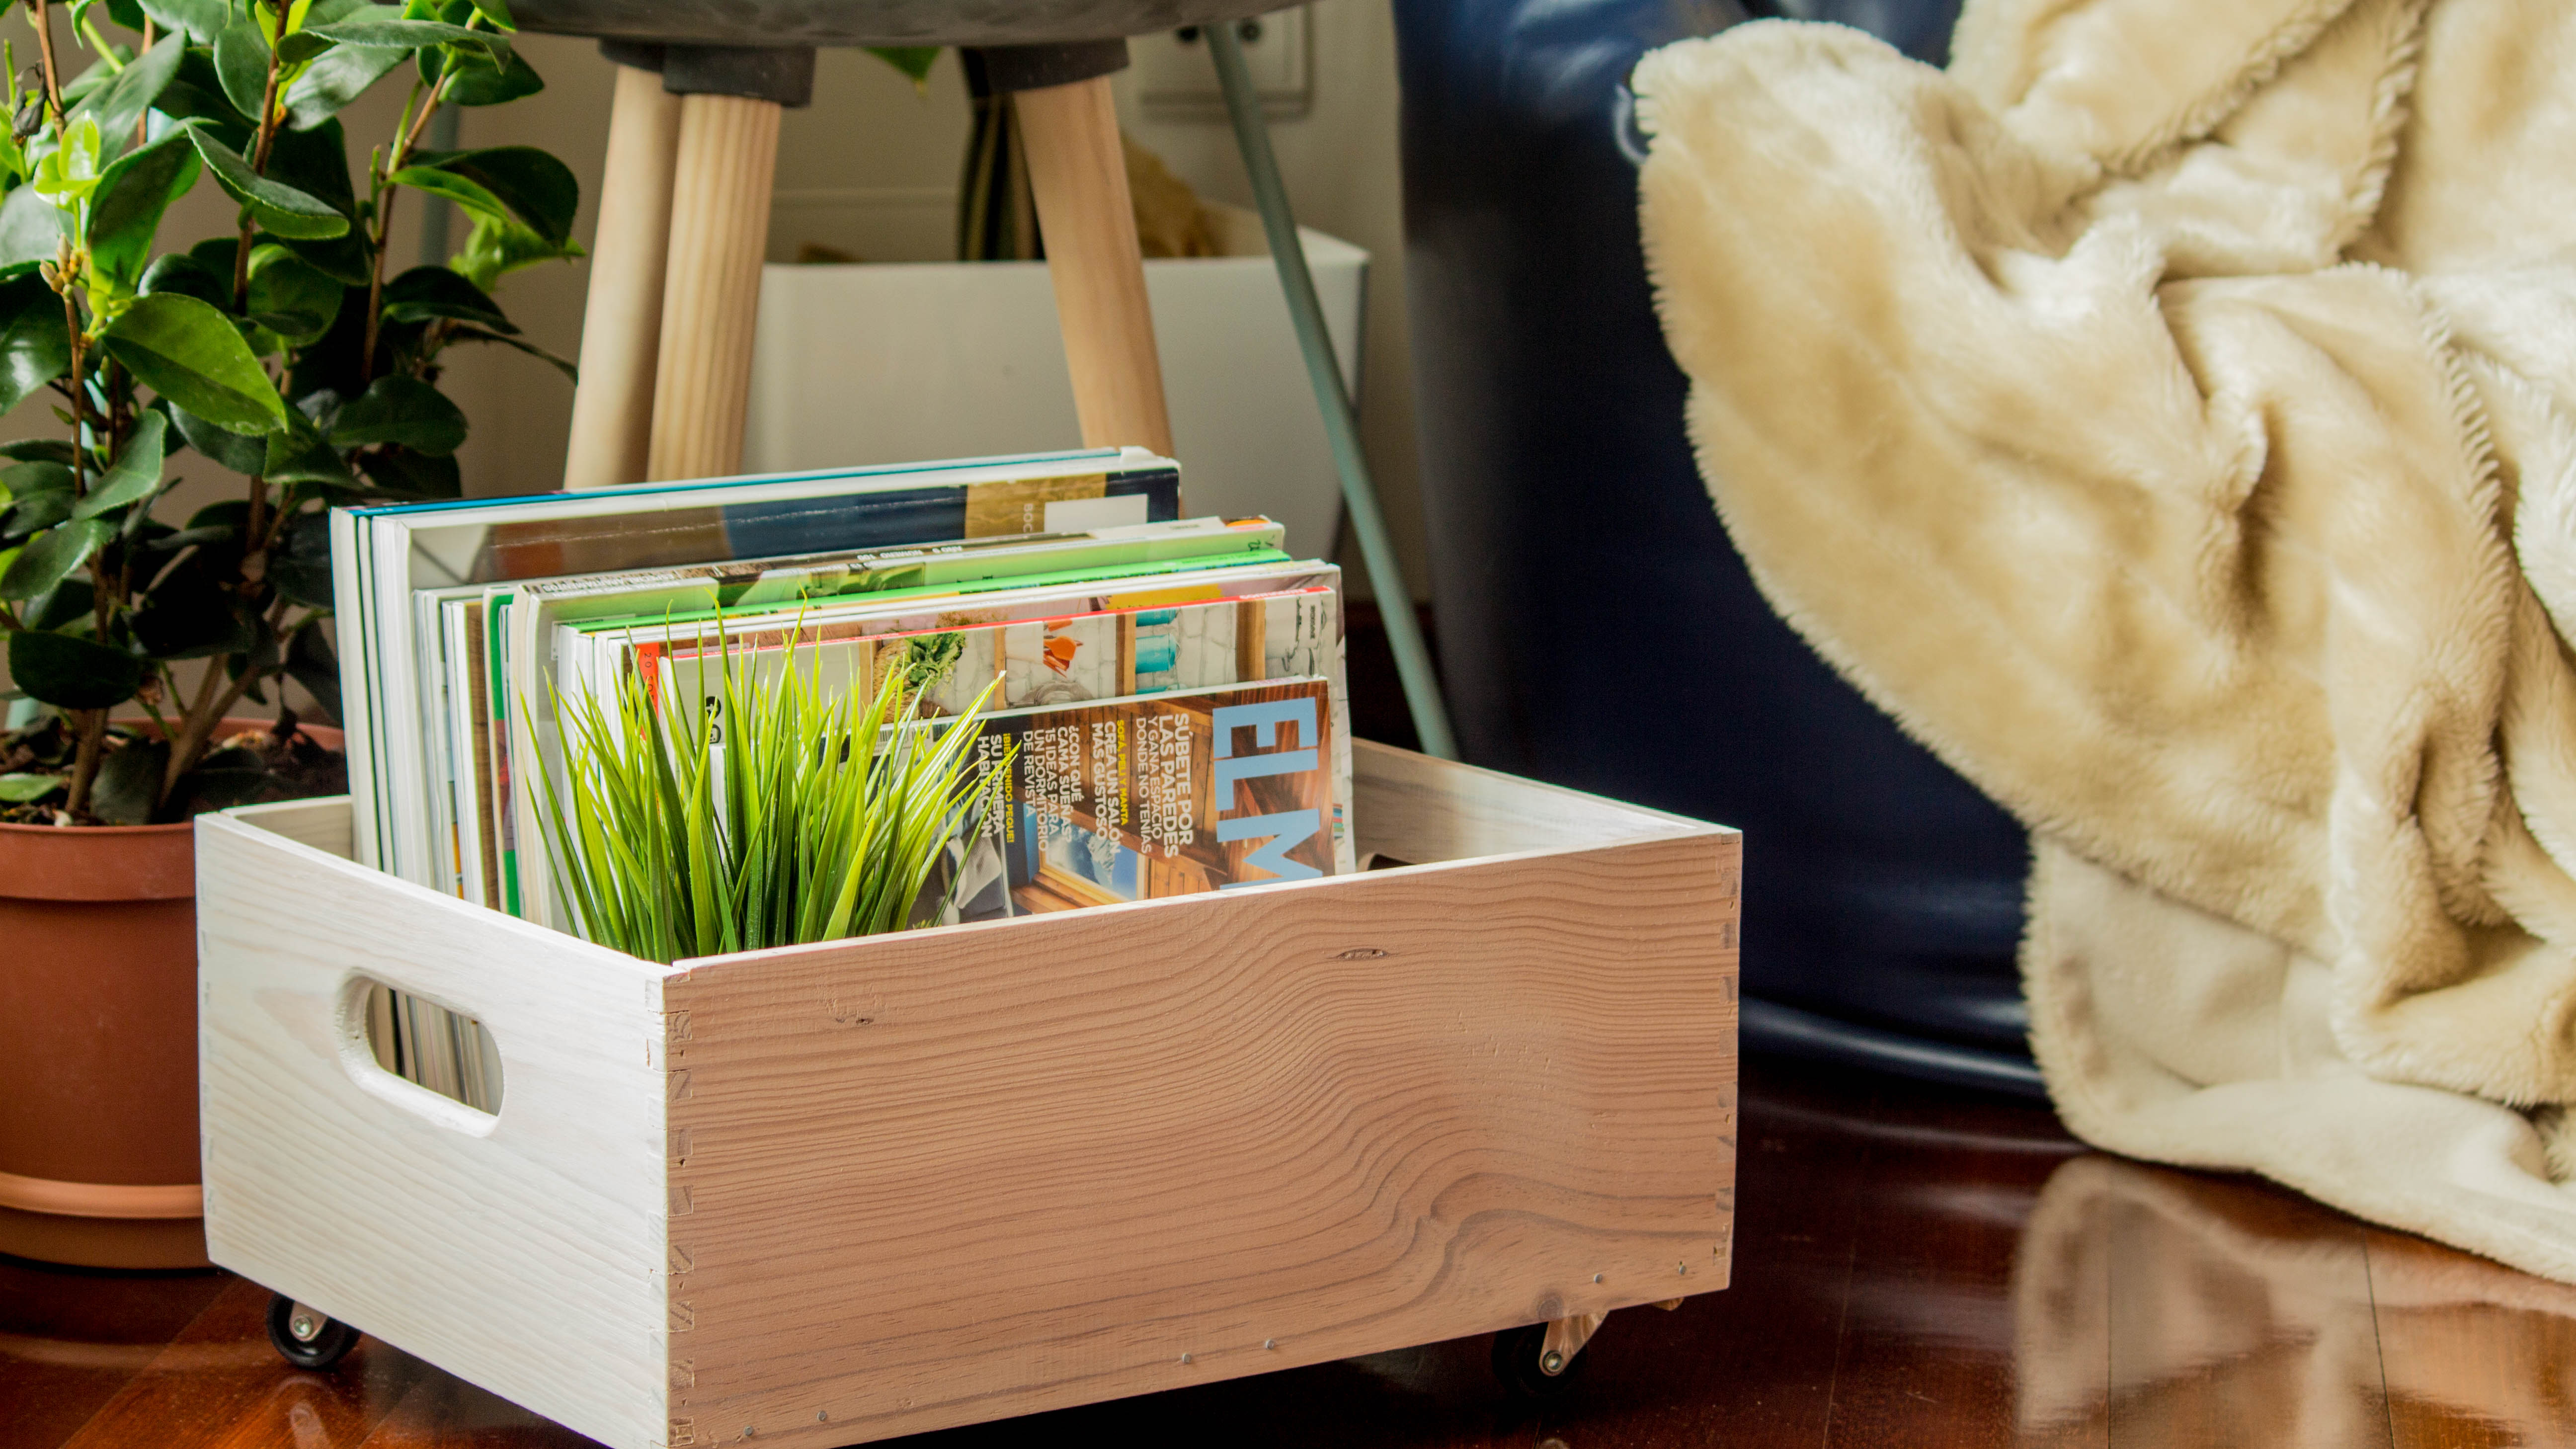
The whole point of this DIY is to store my design magazine and catalogues close to hand. I have so many that I don’t have where to put them, I’m even missing some that I have to search for. Previously, they were saved in a box in the attic, although from time to time, I like to flip through them and while they are up there that is not going to happen. So, I need them in my office where the inspiration is needed.

In terms of aspect, I was indecisive as to what path to take. I thought about painting all white or do the same I did with the stand (painting the bottom in a darker colour), but that way this would be the same DIY. Next, I thought of not painting at all. After buying a side table with fair wood legs, the crate would match. Although the wood from the crate was a bit darker than the table. At that moment, I thought why not try and paint a thin layer of ink just to turn the crate lighter and still be able to see all the veins. So, I did my research, since I’m not an expert in wood painting, and I finally found a way to archive it.
Note: I have to say, this technique would have worked better with a beige colour instead of white, giving the natural look I was looking for. As wood is a warm tone, the white sticks out more, while another light cream colour would have hidden better the darker zones.
Supplies:
Wood Crate (40x30x15 cm)
3 Wood Boards (28×4,4×0,7 cm)
Wood Glue
4 Wheels
8 Screws
12 Nails
Wood Paint (white)


Step 1: Cut the wood boards to size to fit the bottom of the crate. Then apply glue on the sides it will make contact with the box. This way it will help support the weight of the magazines. It doesn’t seem, but they can be quite heavy when you have a fair collection. Also, hammer a couple of nails on each side of the boards to make sure it will stay secure in place.


Step 2: Sand down all the sharp ends of the crate, especially in the handles. Afterwards, wipe all the dust off with a wet cloth to clean the crate and help the ink settle in properly.


Step 3: Here comes the tricky part. The technic itself is easy to do but to get the right colour you need to keep trying. Start painting one side at a time, and while the ink is still fresh, go over it with a wet cloth. Keep doing it until you get the right amount of ink. It’s not easy to create even sides but keep going. Repeat the process for all the side of the crate including the inside.

Step 4: Screw in the wheels and it’s ready to roll! Be aware of any pieces of the crate that can get the wheels stuck. Now you can add magazines or throws and pillows to keep next to your chair and easily move it around.
This is a simple DIY to do and very practical. The layers of paint don’t take that much time and you can do it all in one day. While the glue is drying, and the boards secured with nails, you can start painting right away, and after the paint is dry to touch, you can flip the crate around and start working on the wheels.


With the project done, my only problem was choosing how to store the magazines, I didn’t want to stack them or it would be a pain to get to the bottom ones, and also the bigger magazines didn’t fit along the small side. In the end, it has gaps on both sides – which I’m not too happy about – but as I’ll buy more and more, another solution will pop-up to fix this problem. And also, I put a little pot with a fake plant just to decorate, which also prevents the magazines from sliding down.